Department Approval Queue In The WP Job Portal!
Configure Department Auto-Approval

To manage department approval settings, navigate to the Admin Dashboard → Dashboard Menu → Configurations → Employer Configurations → Auto Approve.
If the department auto-approve is set to “YES,” the department does not require administrator approval for publishing. However, in this case, set the department auto-approve to “NO,” meaning that any new department entries will need admin approval before being published.

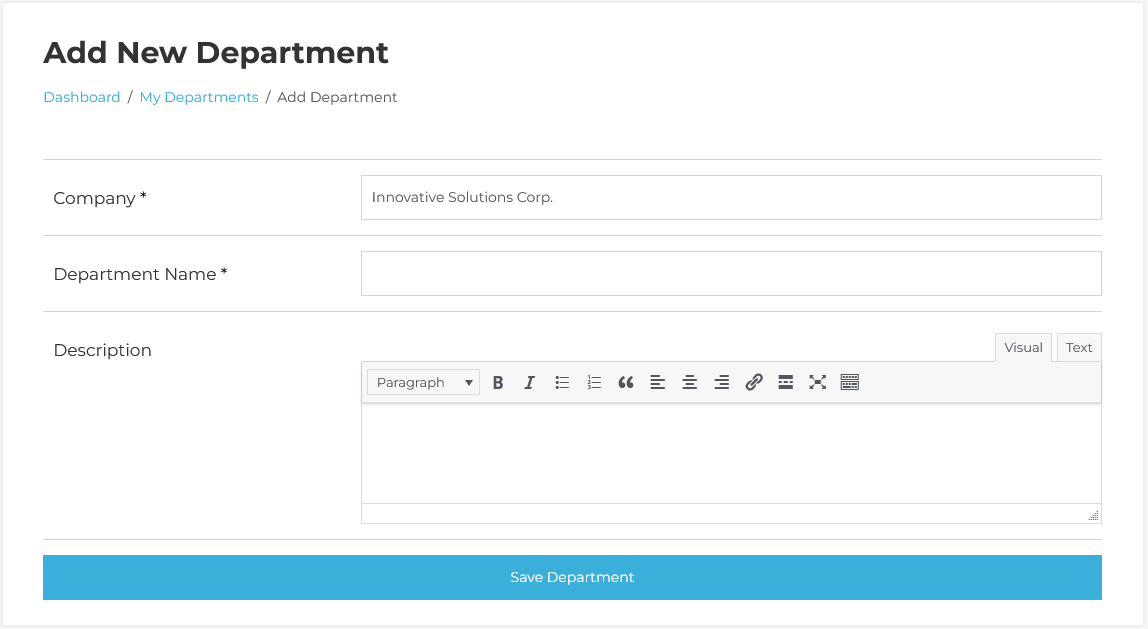
To create a new department, start by filling out the Add Department form. Enter the required department details. Once completed, click the Save Department button. The department has been successfully saved.

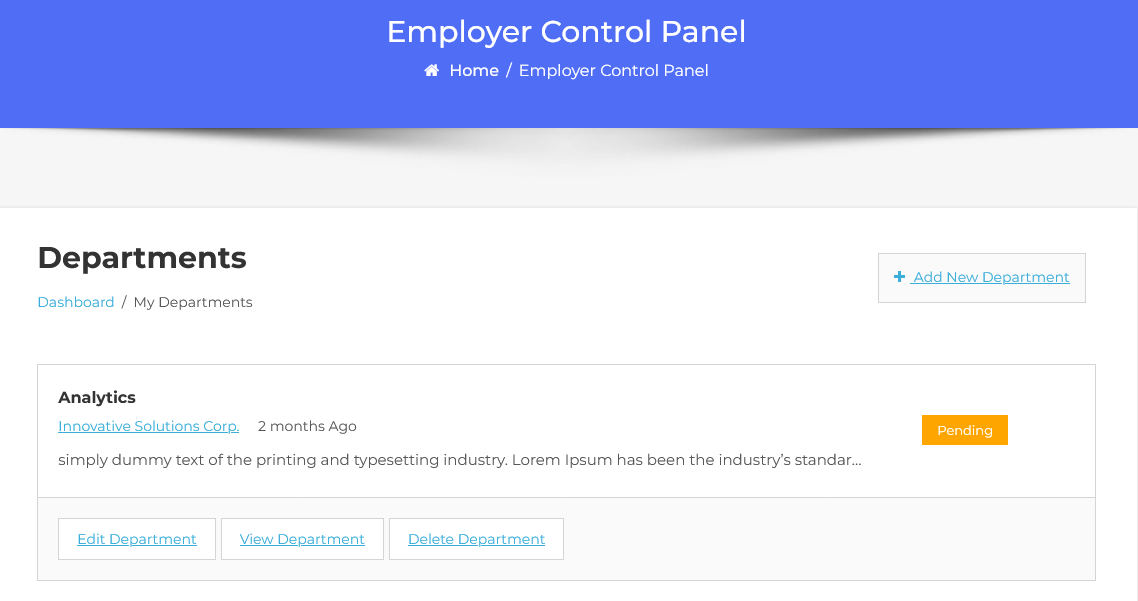
The department list shows all departments added by the employer, including key information such as the department name and details. The current status of the department is marked as “Waiting for approval”. Since the department is pending, it hasn’t been published yet and will require administrator approval to go live.

Start by navigating to the Admin Dashboard → Dashboard Menu → Departments → Approval Queue.
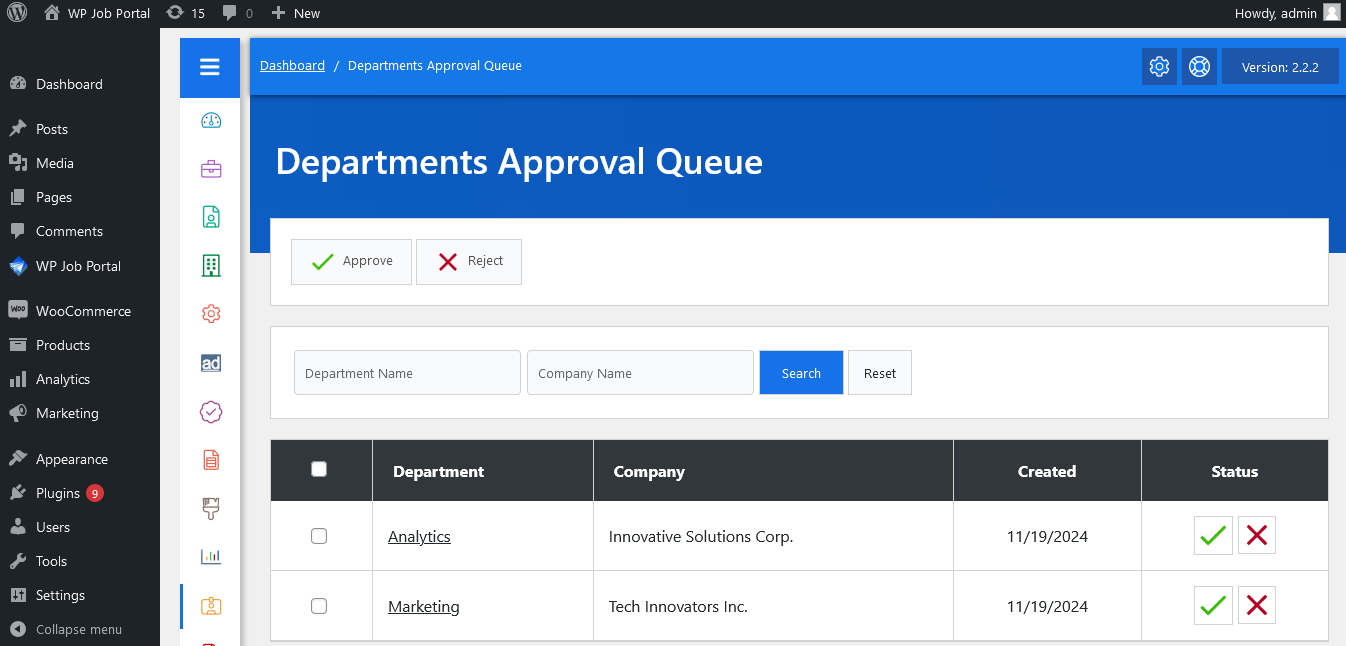
Within the approval queue, you will see a list of departments awaiting your approval. You can search, sort, and take actions such as Approve and Reject Departments with a pending status will be displayed. The admin can approve a department by clicking the Approve button, and changing its status to approved and rejected. If the admin clicks the Reject button, the department will be marked as rejected.


