Add Job In WP Job Portal!
This step-by-step guide will explain the process of posting jobs, making it easy for you to add both free and paid job submissions. So let’s get started!
Add Job Employer Side
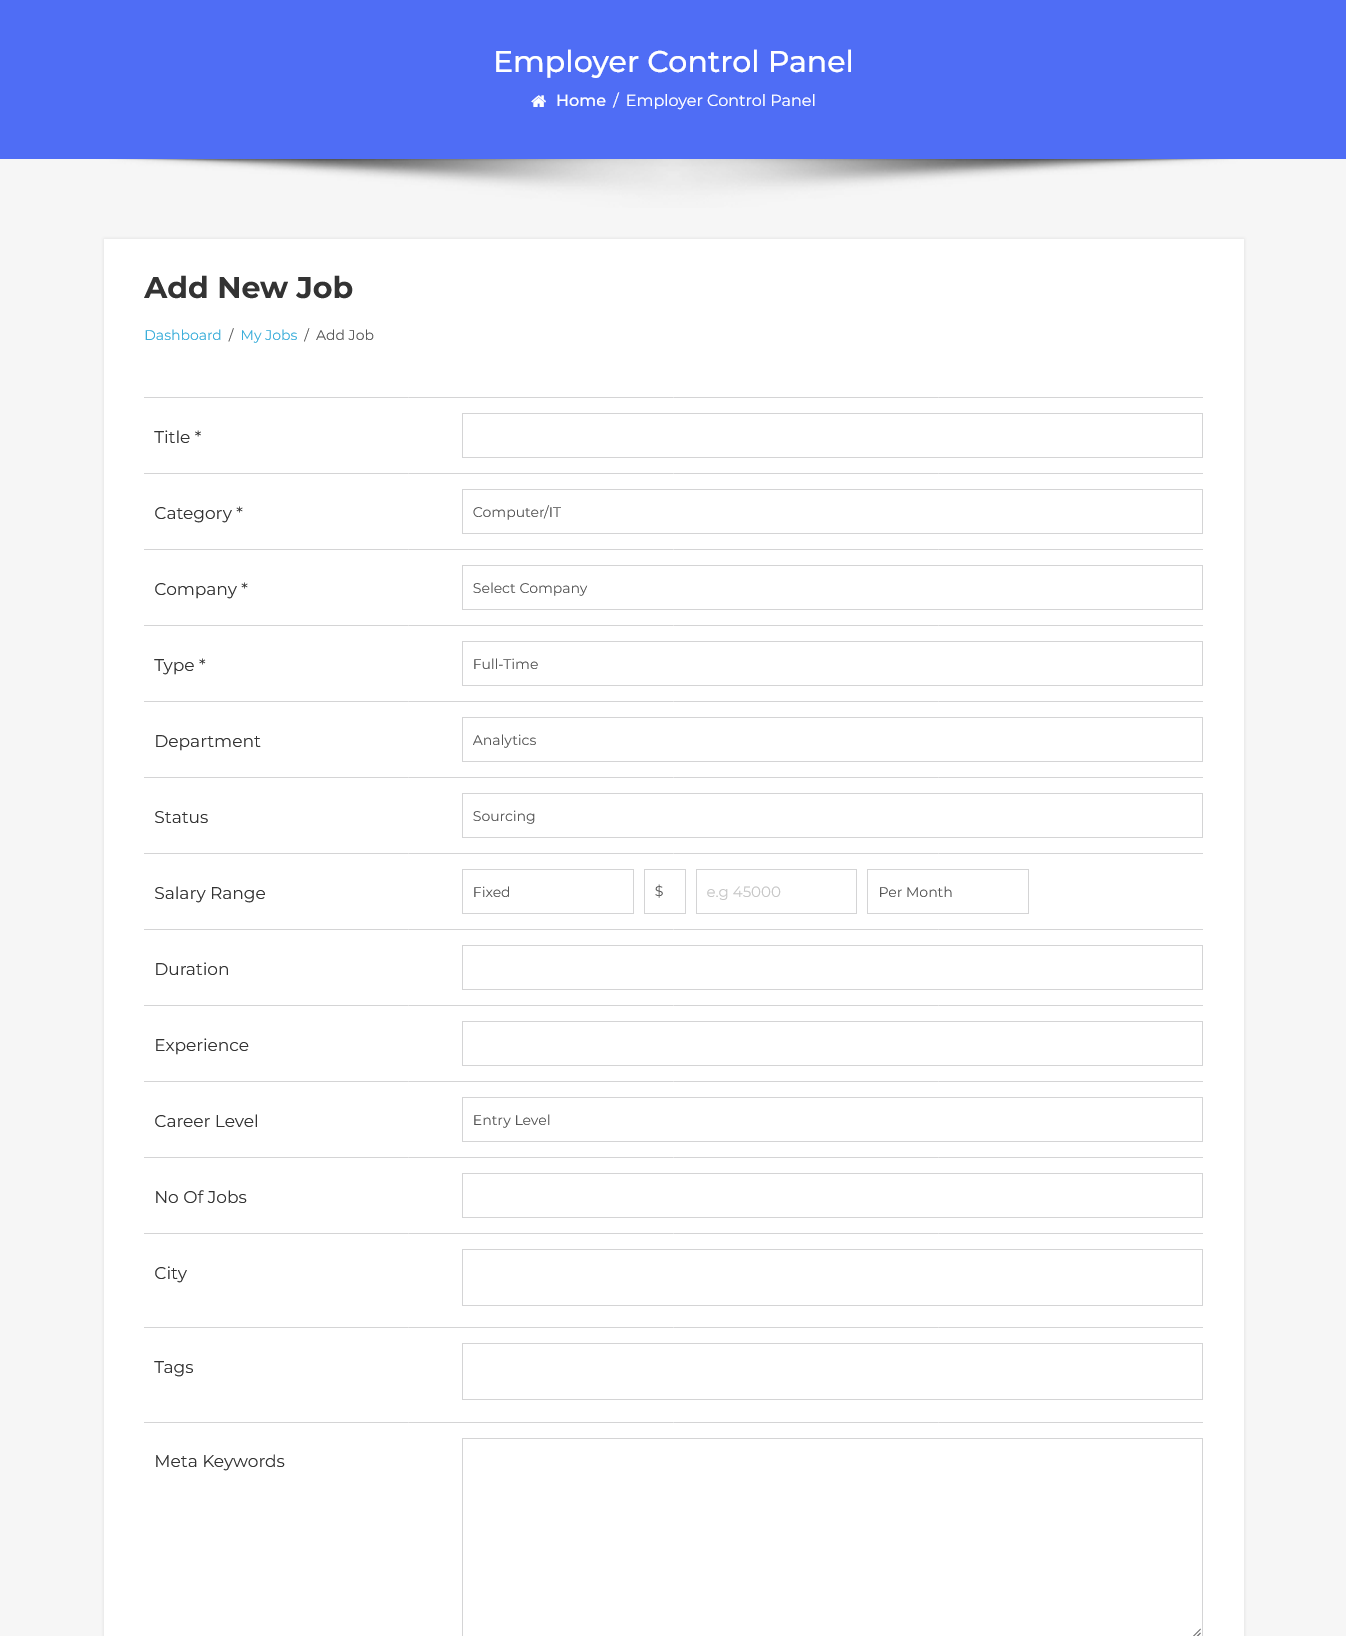
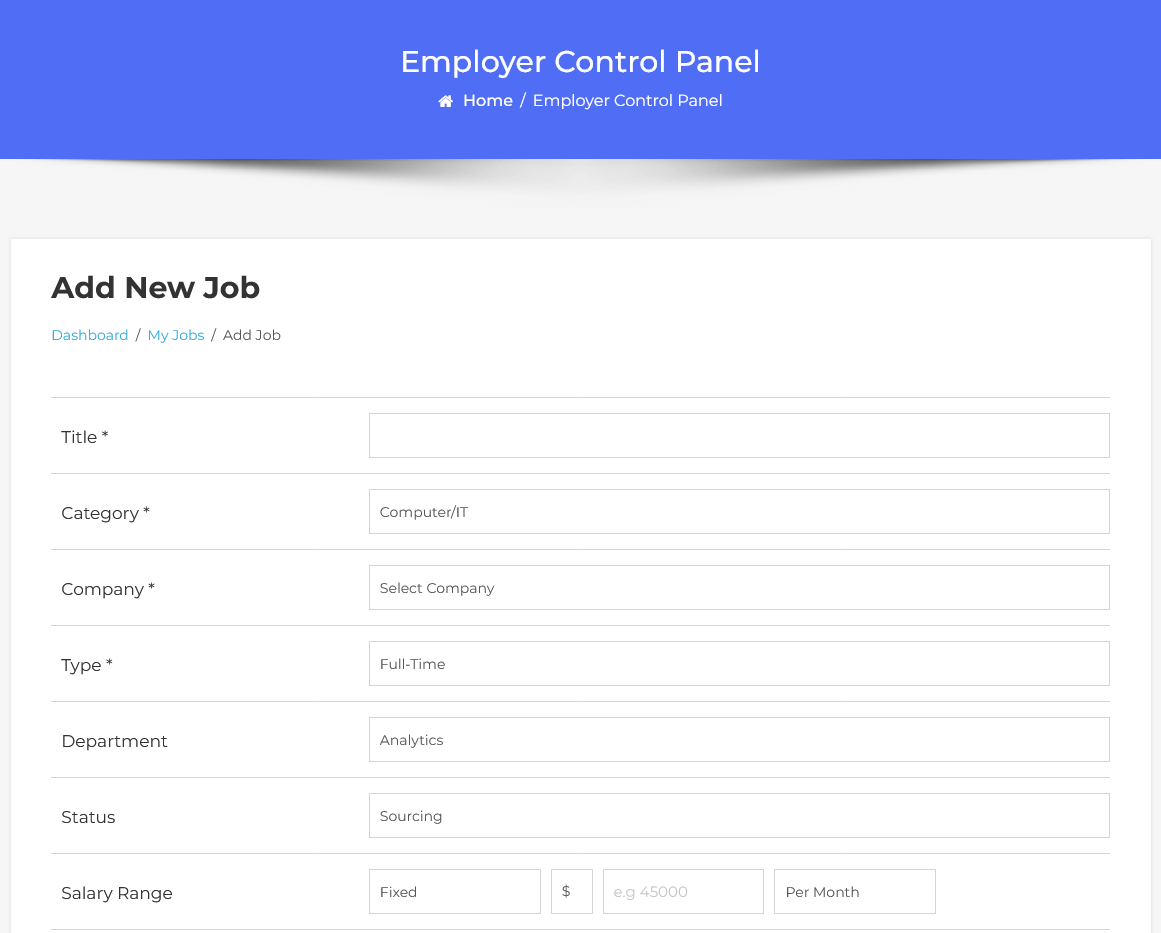
From your employer dashboard, navigate to the Employer Dashboard–> Add Job to start creating jobs effectively. On the ‘Add Job’ form, we will provide all the necessary details for posting a job.
- Start by entering the job title that clearly describes the position.
- Select the appropriate job category from the dropdown menu to help candidates find the job easily.
- Choose the company for which the job is being posted. All available companies are listed in the drop-down menu.
- Specify the job type, such as full-time, part-time, contract, or internship.
- Indicate the department the job belongs to, which helps in organizing jobs within the company.
- Set the job status to sourcing, interviewing, or any other relevant status option. This field helps you track the current stage of the hiring process for each job.
- Enter the salary range for the position, specifying whether it is monthly or yearly.
- Provide the required education level for the job, such as a high school diploma, bachelor’s degree, etc.
- Mention the duration of the job, whether it’s a permanent position or a temporary contract.
- Specify the amount of experience required for the job, such as 1-2 years, 5+ years, etc.
- Indicate the career level, such as entry-level, mid-level, or senior-level.
- Enter the number of positions available for this job title.
- Add the city where the job is located to help candidates know the job location.
- Include relevant tags and meta keywords to improve the job listing’s visibility in search engines.
- Provide the geographical coordinates for the job location to help display the job on a map.
- Set the date when the job listing should stop being published or displayed on the portal.
- Write a detailed description of the job, including responsibilities, qualifications, and any other pertinent information.
- Lastly, add a meta description that summarizes the job and is optimized for search engines.
- In the Email Settings section, employers can choose how they want to receive notifications about new job applicants. There are three options available:
- First, do not email me. With this option, no job application notifications will be emailed to you.
- The second option selecting this option will ensure that you receive a job application notification via email, including the resume of the applicant.
- The third option provides the most comprehensive notifications. You’ll receive an email notification with both the resume and any additional attachments submitted by the applicant.
Once all these details are filled in, you can save the job, and it will be posted on your job portal.
Setting Up Paid Submissions-Membership (Admin Side)
Now let’s walk through the process of posting jobs with paid submissions.
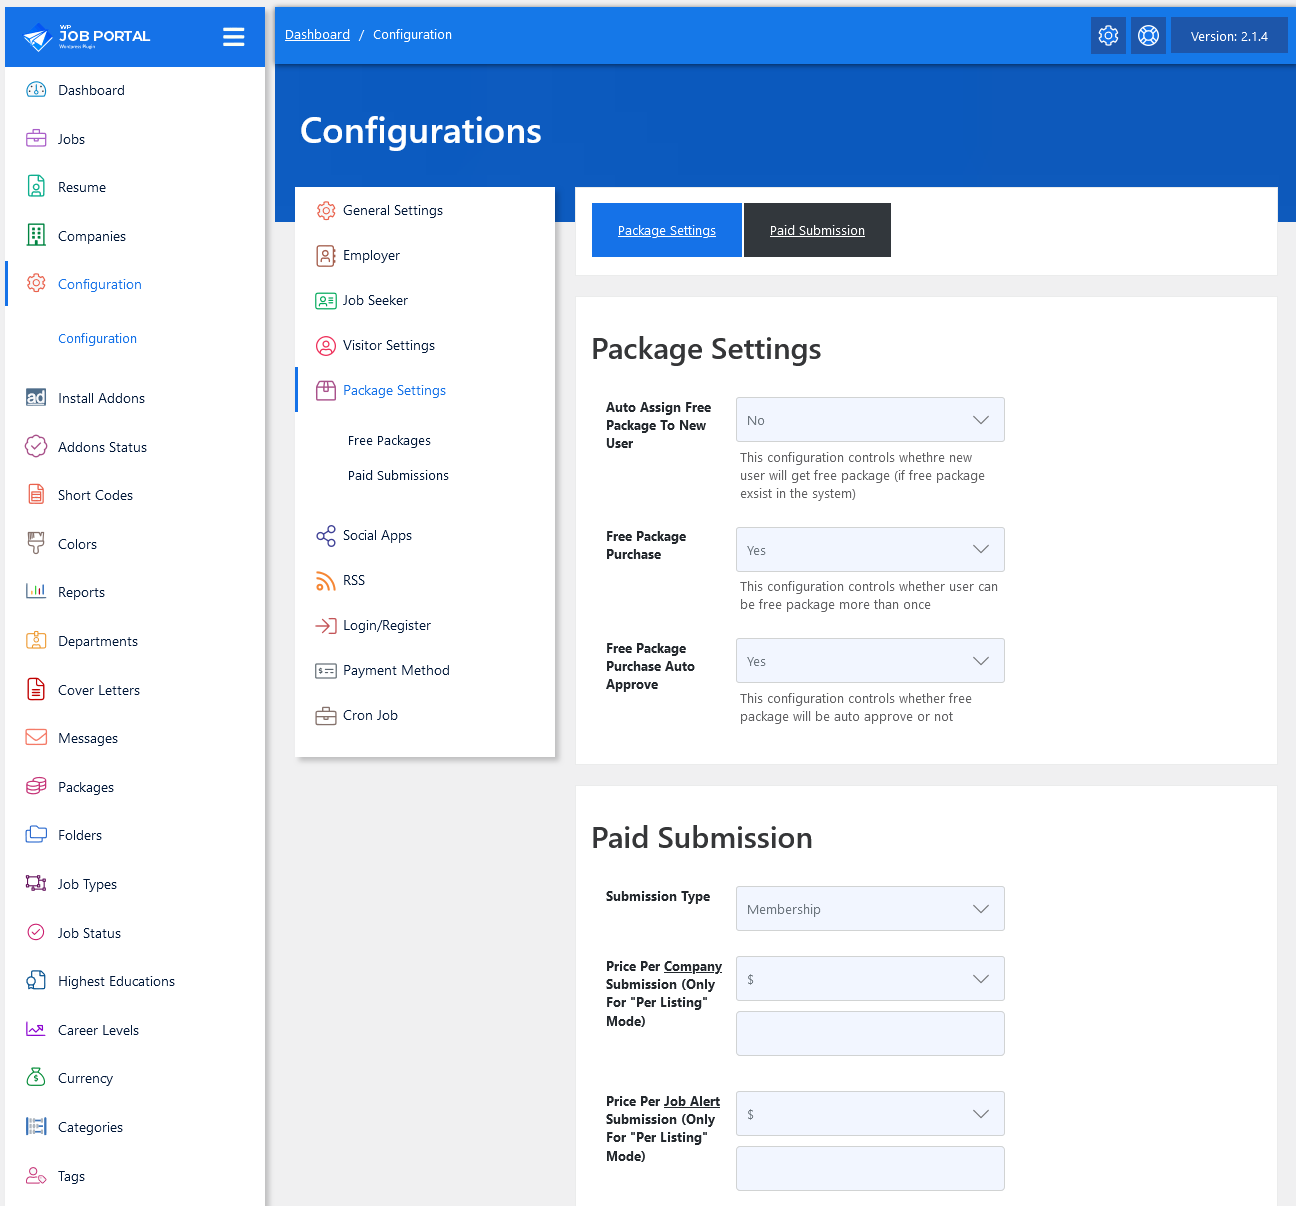
Start by navigating to the Admin Dashboard–> Dashboard Menu–> Configurations–> Package Settings–> Paid Submission.
In the paid submission section, we’ll start by selecting the submission type. WP Job Portal offers two types: paid submissions Per Listing and Membership. Let’s proceed with the membership plan first. After selecting the membership plan, let’s proceed to set up a package for this plan. Save your configurations.
Add Package (Admin Side)
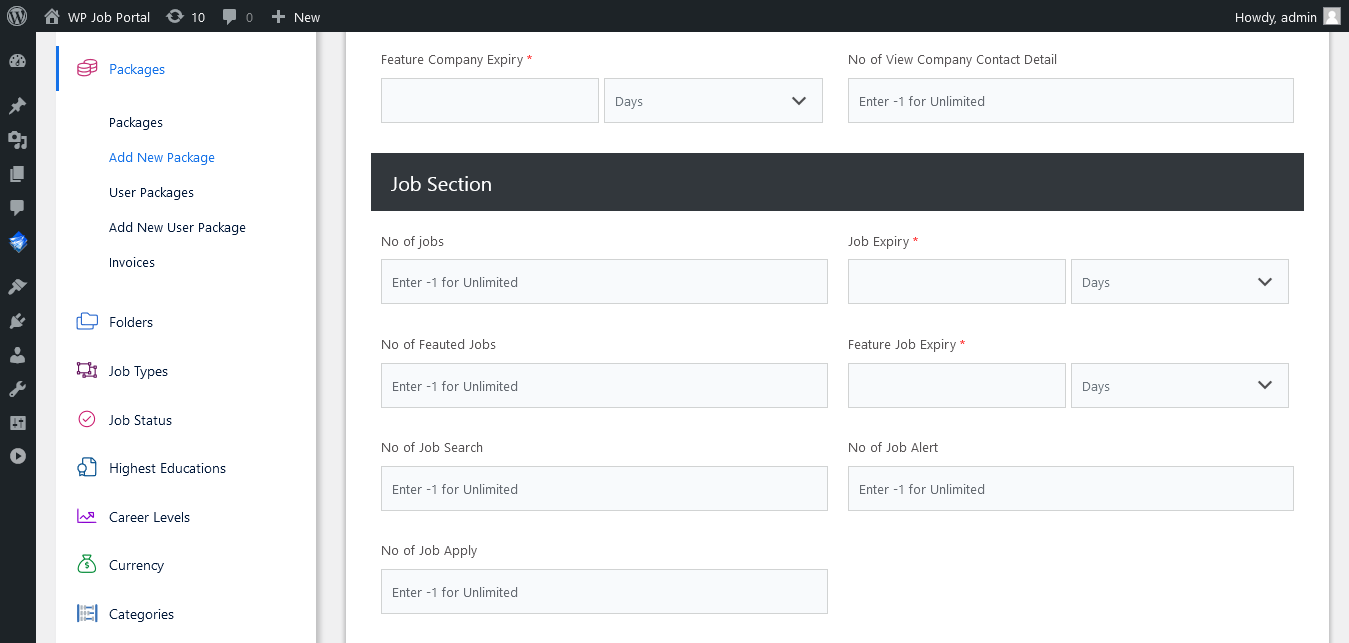
Now navigate to the Admin Dashboard–> Dashboard Menu–> Packages–> Add New Package.
On this page, create your package. Since we are creating this package specifically for job postings, we will detail the relevant information. After explaining the basic details of the package, move to the job section and specify the number of job postings. Be sure to fill in all required fields marked with an asterisk. Once completed, set the package status to “publish” and save the package. The job-specific package has been created.
Add Job With Paid Submission-Membership
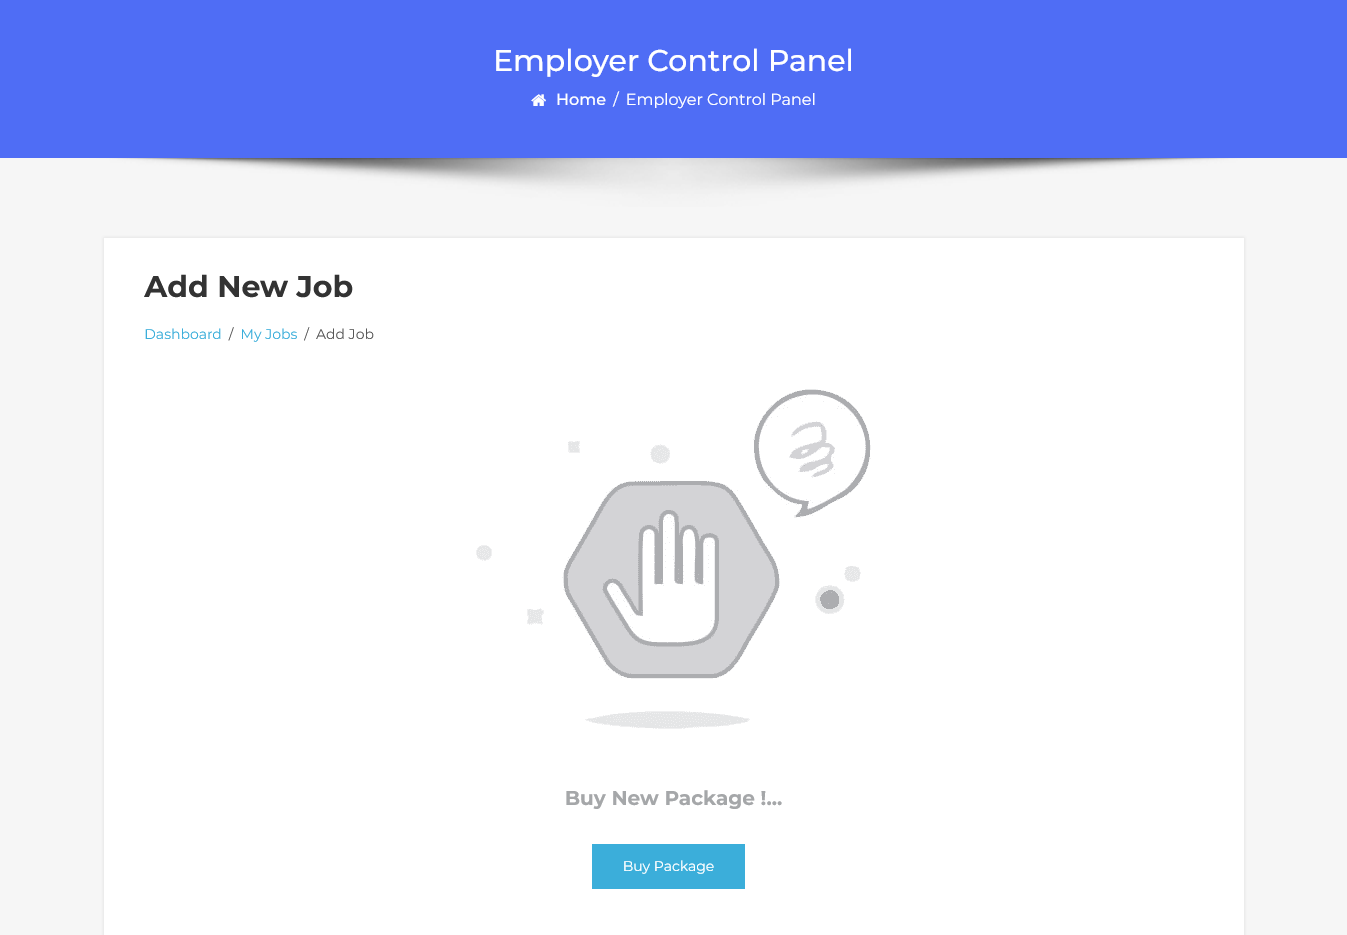
Now, let’s head to the employer dashboard to proceed with a paid job submission by purchasing a package. Simply click on “Add Job” in the menu. Once the membership plan is enabled, you will see the requirement to buy a package for job posting. Click on the “Buy Package” button to continue.
Packages List Page
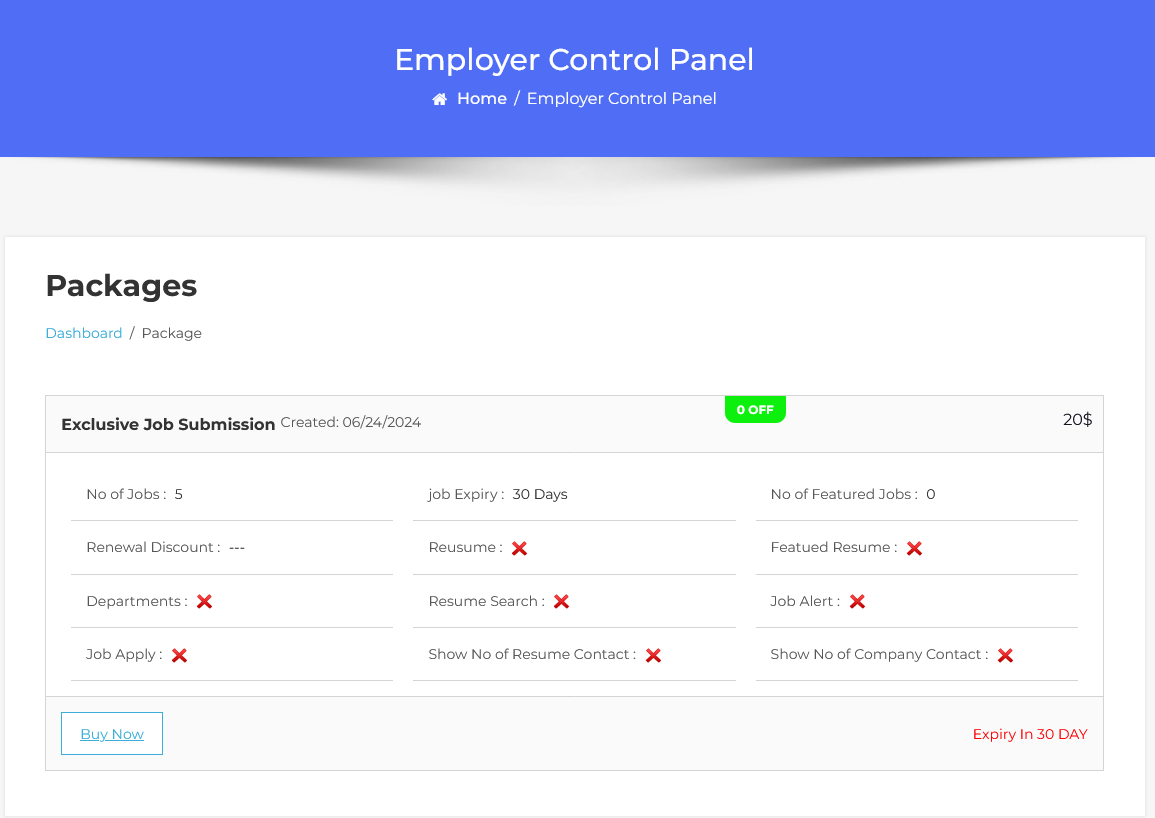
This action will direct you to the packages list page. Simply click the “Buy Now” button and a popup window will appear with the payment method options you have enabled on your site. Choose your preferred payment method and click “Buy Now.”
Select Payment Method
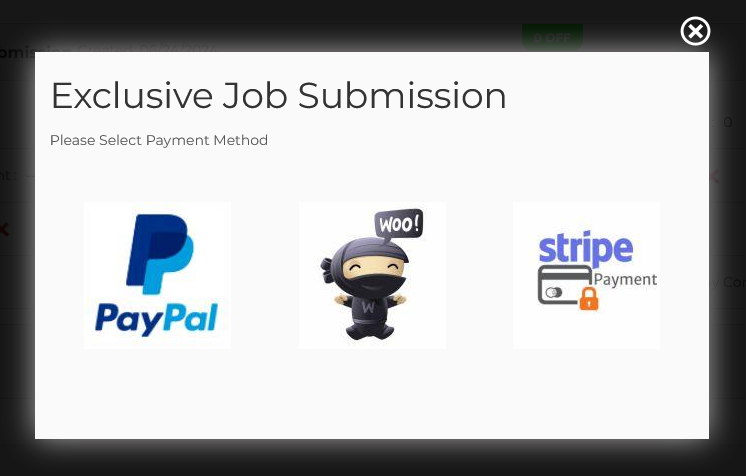
After completing the payment with PayPal, the package has been purchased.
Add New Job
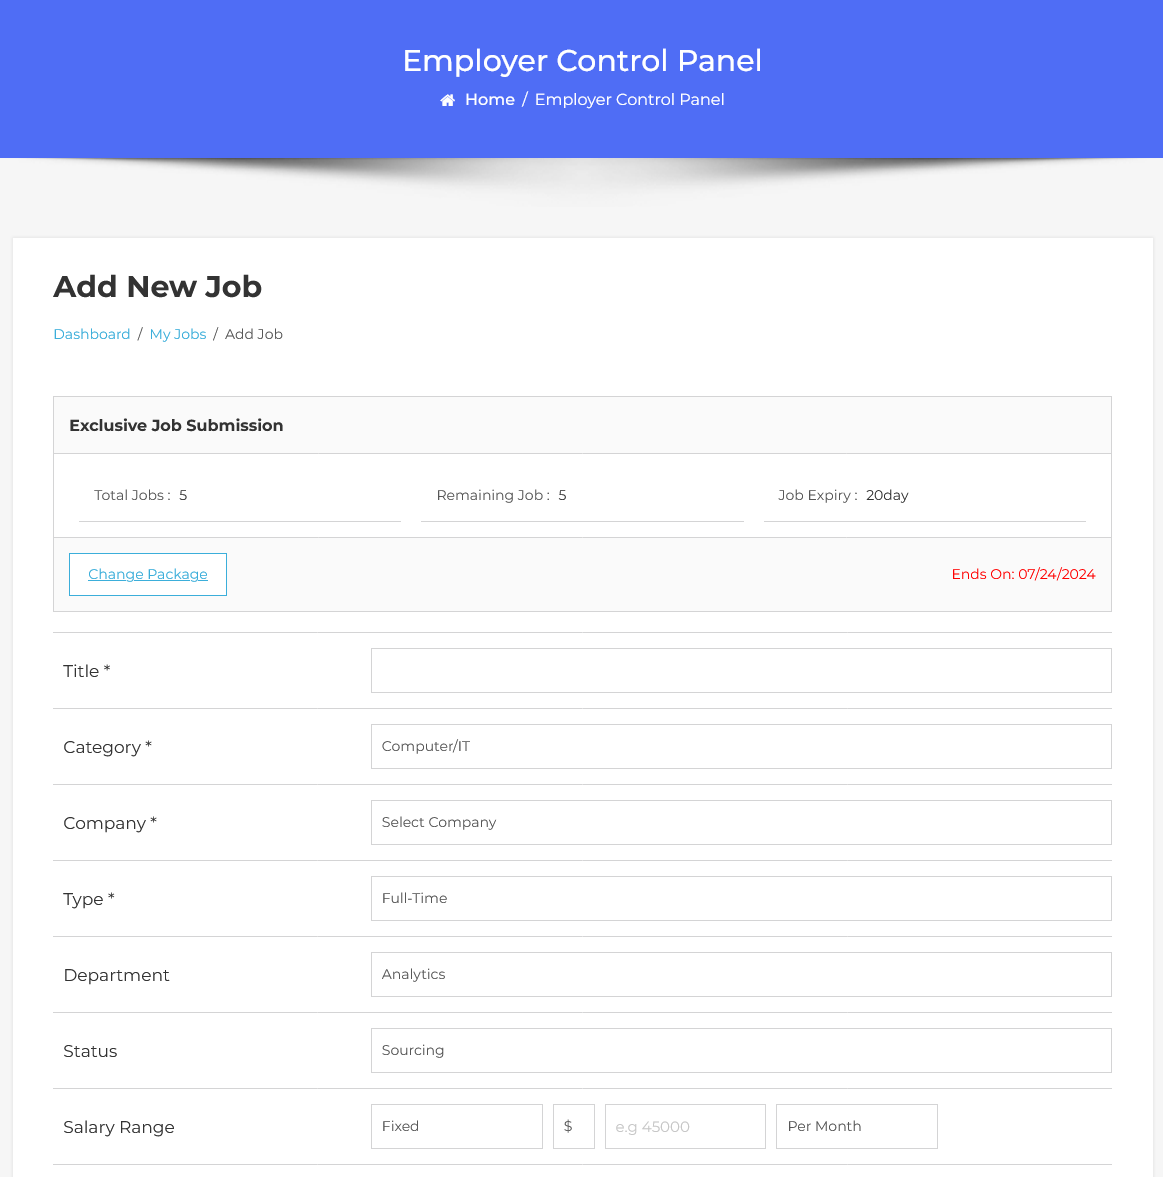
The “Add New Job” form will open. The package details about jobs are displayed on the form, showing the total number of jobs available to add, the remaining jobs, and the job expiration time. Now, proceed to fill in the details about the job. Once you’re done with the information, click ‘Save Job’ to create and publish the job.
The job has been created with paid submission.
Setting Up Paid Submissions-Per Listing Mode (Admin Side)
Now let’s walk through the process of posting jobs with paid submissions.
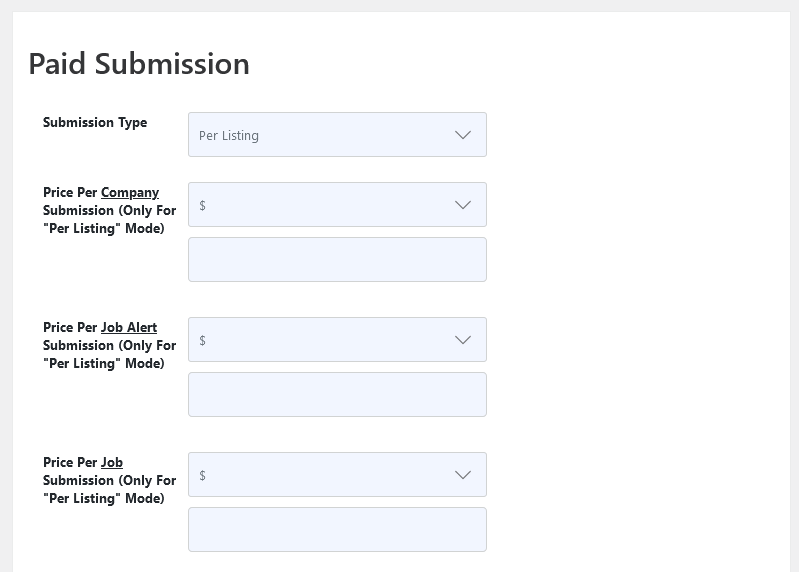
Starting by navigating to the Admin Dashboard–> Dashboard Menu–> Configurations–> Package Settings–> Paid Submission–>Submission Type choose the “Per-Listing”.
Now, let’s walk through the process of paid job submissions using the per-listing mode. Let’s proceed with the per-listing mode. After selecting the per-listing mode. When using the per-listing mode, payment will be charged for each job submission. Next, we will set the currency and price for the per-job submission. Once you’ve set the price per job submission, save your configuration settings.
Add Job With Per Listing Mode
Now we proceed with the steps involved in adding new paid job submissions with the per-listing mode.
Start by filling out the job creation form with all the essential details about the position.
Once you’re done, hit the ‘Save Job’ button.
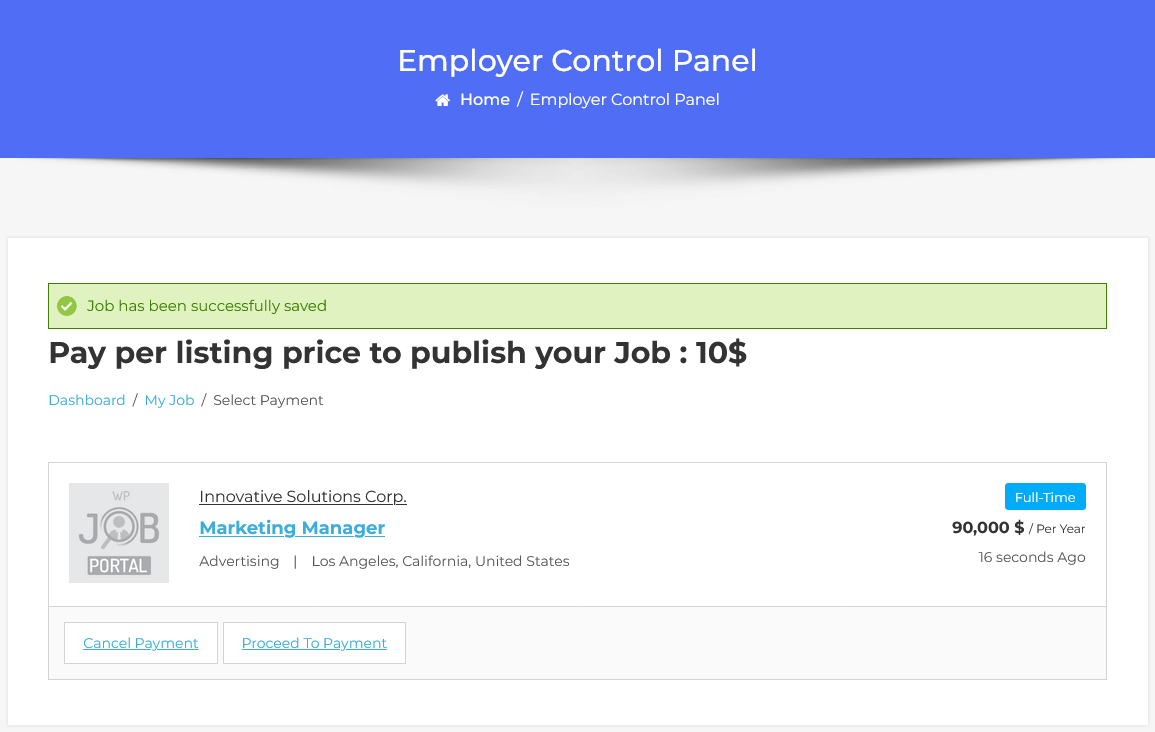
You’ll notice that the job has been created but is not published due to paid submissions. To get your job listing live, we’ll need to go through the payment process.
Select Payment Method
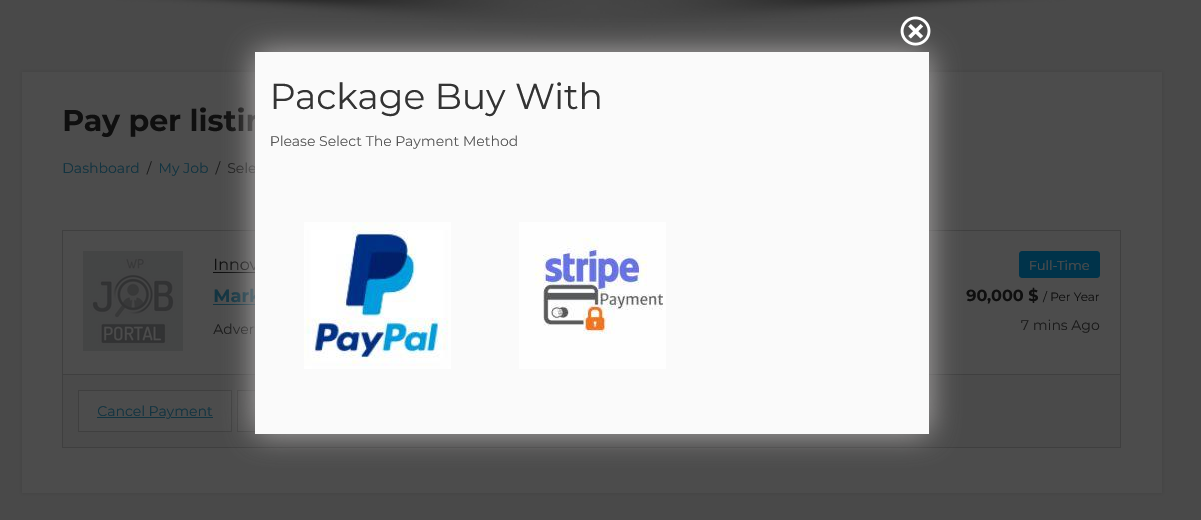
Click on ‘Proceed to Payment’, triggering a pop-up allowing you to select a payment method to pay for this job submission. After selecting your preferred payment method and completing the payment, the job will be published. By following these steps, you’ll be able to effectively manage paid job submissions using the per-listing mode.